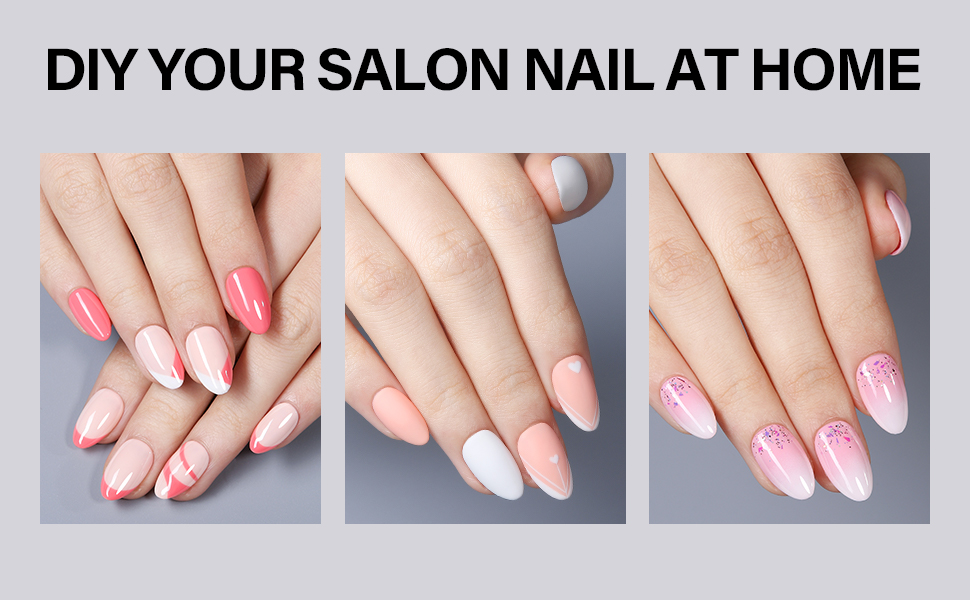
Nail extension kits are specialized kits that allow the user to professionally do nail extensions on themselves, which is why they have grown exponentially in popularity. Along with all the necessary tools, they come with tips and tricks that can make the processes of applying nails effortless. This writing seeks to explain and guide the user on choosing the right toolkit, its essential tools, step by step application procedures, and maintenance tutorials
Understanding DIY Nail Extension Kits

Professional looking nails are a must for so many people who seek to achieve a level of refinement in their appearance. Any DIY kit should contain some essential requirements including:
- Tip Sculpters: These are used as pre-formed tips for sculpting nails.
- Adhesives: Glue or gel to attach the extensions.
- Nail Files and Buffers: For shaping and smoothing.
- Base and Top Coats: To ensure longevity and shine.YouTube+9InStyle+9Semilac+9
- UV/LED Lamp: Essential for curing gel-based products.Semilac+1The Sun+1
Some kits may also include additional items like cuticle pushers, nail clippers, and decorative elements.
Types of Nail Extension Kits

Understanding the different types of nail extension kits can help you choose the one that best suits your needs:
- Acrylic Kits: These use a combination of liquid monomer and powder polymer to create a hard protective layer over the natural nail. Acrylics are known for their durability but require proper ventilation during application due to strong odors.
- Gel Kits: Gel extensions involve applying a gel substance that is cured under a UV or LED lamp. They offer a glossy finish and are more flexible than acrylics, making them less prone to cracking.Semilac+1InStyle+1
- Polygel Kits: Polygel combines the best of acrylic and gel, offering a lightweight yet strong extension. It’s easier to mold and doesn’t set until cured under a lamp, providing more control during application.
- Dip Powder Kits: These involve dipping the nail into colored powder and sealing it with a clear protective polish. Dip powders are known for their ease of application and long-lasting results.
Essential Tools for DIY Nail Extensions
In addition to the items provided in most kits, having the following tools can enhance your at-home manicure experience:
- Cuticle Pusher and Nippers: To prepare the nail bed.HelloGiggles+1Reddit+1
- Nail Dehydrator and Primer: To ensure better adhesion of the extension.
- Lint-Free Wipes: For cleaning the nail surface without leaving fibers.
- Brushes: Specific brushes for applying gel or acrylic products.Byrdie
- Nail Drill: For more efficient filing and shaping, especially useful for acrylics.
Step-by-Step Guide to Applying Nail Extensions

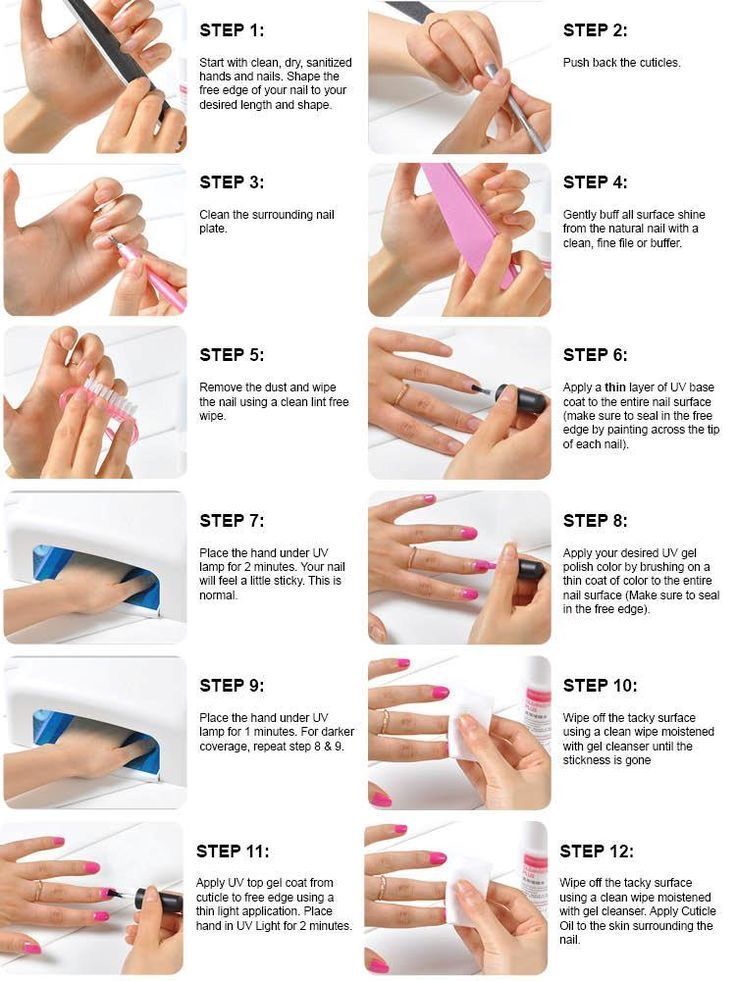
1. Preparation
- Sanitize: Wash your hands and sanitize all tools.
- Cuticle Care: Gently push back and trim excess cuticles.Revel Nail+2Revel Nail+2Semilac+2
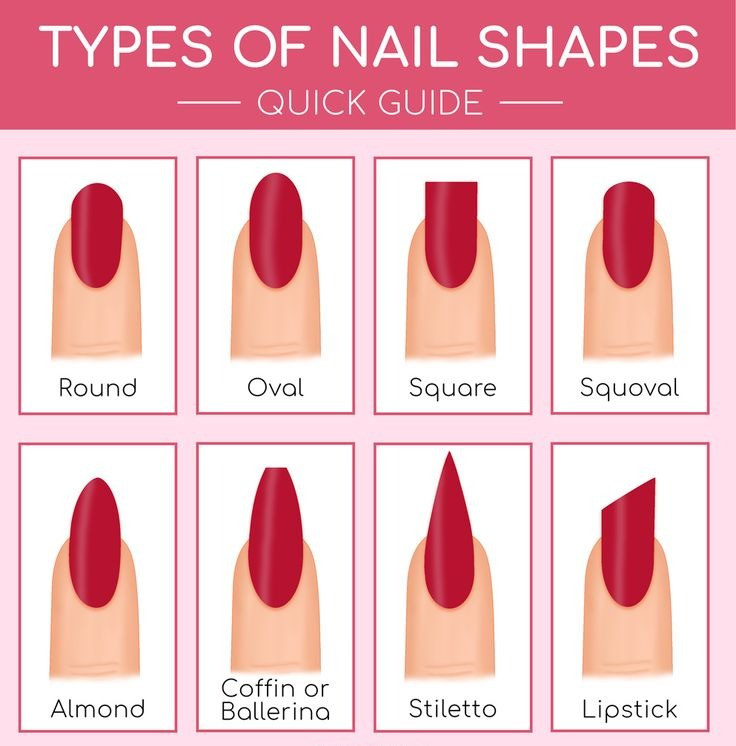
- Nail Shaping: Trim and file your natural nails to the desired shape.Revel Nail+2Semilac+2Revel Nail+2
- Buffing: Lightly buff the surface to remove shine, aiding in better adhesion.
- Dehydrate and Prime: Apply a nail dehydrator followed by a primer to prepare the nail bed.Reddit+2sunnywayoflife.com+2Semilac+2
2. Application
- Select Tips or Forms: Choose the appropriate size for each nail.Semilac+1HelloGiggles+1
- Adhere Extensions: Apply glue or gel to the tip/form and attach it to the natural nail, ensuring there are no air bubbles.
- Cure (if using gel): Place nails under the UV/LED lamp as per the product’s instructions.Semilac+1sunnywayoflife.com+1
- Shape and File: Once set, file the extensions to the desired shape and smooth the surface.
3. Finishing Touches
- Apply Base Coat: This helps in better adhesion of the polish.InStyle+7The Sun+7sunnywayoflife.com+7
- Color Application: Apply your chosen nail polish color, curing between coats if using gel.
- Top Coat: Seal your manicure with a top coat for added shine and protection.
- Cuticle Oil: Finish by applying cuticle oil to nourish the skin around your nails.sunnywayoflife.com
Maintenance and Removal

Proper maintenance ensures the longevity of your nail extensions:
- Avoid Using Nails as Tools: This prevents unnecessary stress and potential lifting.
- Regular Fills: As your natural nails grow, fill in the gap between the extension and cuticle every 2-3 weeks.
- Moisturize: Keep your hands and cuticles hydrated to maintain healthy nails.
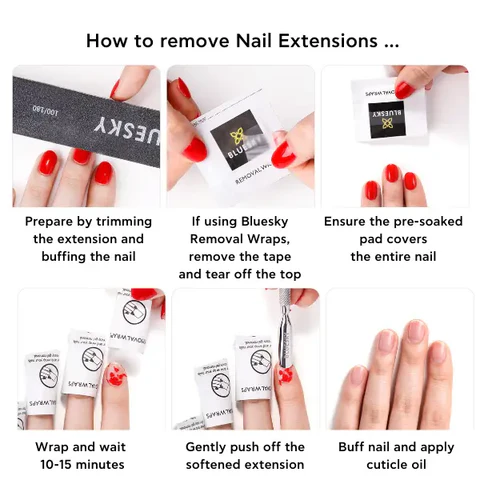
For removal:
- Soaking Method: Soak nails in acetone for the recommended time, then gently remove softened extensions.Reddit+1allure.com+1
- Avoid Peeling: Never peel off extensions, as this can damage the natural nail.
Tips for Success
- Practice Makes Perfect: Your first few attempts might not be flawless, but with practice, your technique will improve.
- Follow Instructions: Always adhere to the specific instructions provided with your kit for the best results.
- Invest in Quality: Higher-quality kits and tools can make the process easier and yield better results.
- Watch Tutorials: Visual learners can benefit from online tutorials to understand the application process better.
Conclusion
DIY nail extension kits offer a convenient and cost-effective way to achieve beautiful nails from the comfort of your home. By understanding the types of kits available, gathering the necessary tools, and following a structured application process, you can enjoy salon-quality nails without the salon price tag. Remember, patience and practice are key to mastering the art of at-home nail extensions.
For a visual demonstration, you might find this tutorial helpful: